So bought myself a nice new set of hardware and had some issues trying to get a RAID-0 booting into windows 10 with 2x Samsung 960 PRO NVMe M.2 drives.
Lots of searching the webs, people saying it can’t be done … well, it can – and it works.
Here’s what worked for me:
- What you need:
- 2x M.2 NVMe drives. I’m using Samsung 960 PRO 512GB NVMe SSDs
- An ASUS ROG STRIX X299-E Gaming motherboard (This may work on other x299 based boards as well)
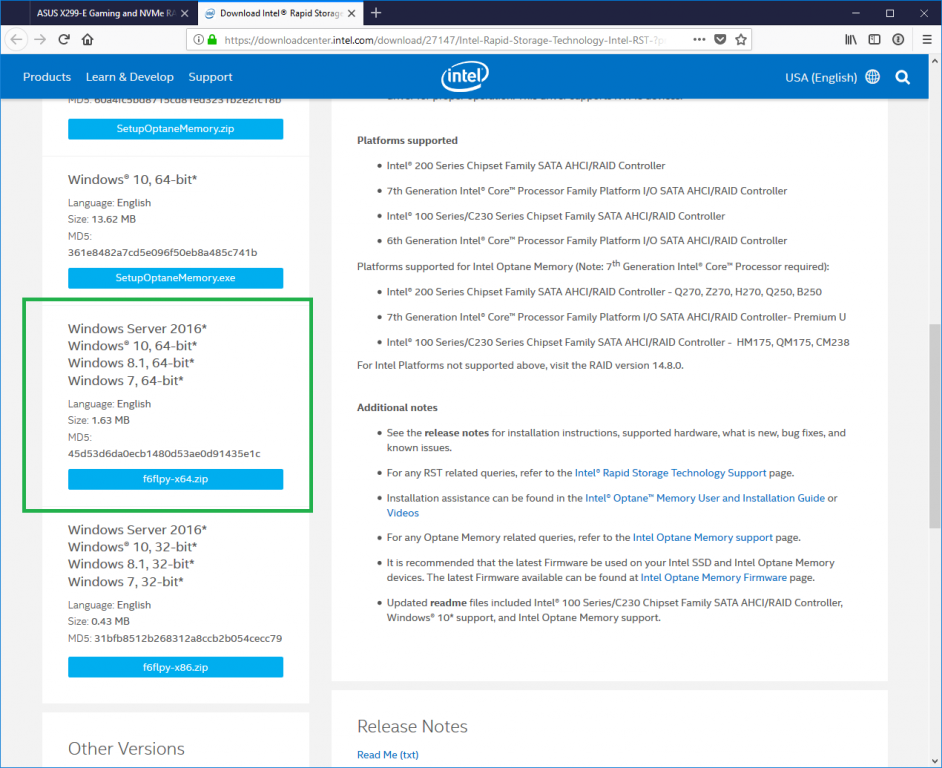
- The PROPER download from Intel for the Intel Rapid Storage Technology (Intel RST). This will not work with the drivers provided on the ASUS DVD that comes with the motherboard. Use the newest version available, I’m using 15.8.1.1007 which is the latest as of writing this post.
Download Here: https://downloadcenter.intel.com/download/27147/Intel-Rapid-Storage-Technology-Intel-RST-?product=55005
Make sure to get the f6flp-x64.zip (direct download) and extract that onto a USB key for use during Windows installation.

- BIOS Setup:
- Press DEL on startup to go into the BIOS
- Set “Advanced -> PCH Storage Configuration -> SATA Mode Selection” to “Intel RST Premium(RAID)”
- “Exit -> Save Changes & Reset”, going immediately back into the BIOS using the DEL key on restart
- Under “Advanced” there will be a new option at the bottom “Intel Rapid Storage Technology”. Go into that and configure your RAID volume using the NVMe disks and select an appropriate stripe size for your SSDs. I selected 128k, because I assume most files I will be working with will be that or larger. It will likely be more optimal to select a smaller size for quick boot/OS responsiveness. The only way to be sure would be to benchmark each setting, which I’m not going to do today.
- Windows Installation:
- Install windows as normal, when asked for disk location for installation, you will need to “load” the driver from the USB key.
- Select “Intel(R) Chipset SATA/PCIe RST Premium Controller”
- The NVMe RAID disk should now be available to install windows. Select this disk and finish the installation process.
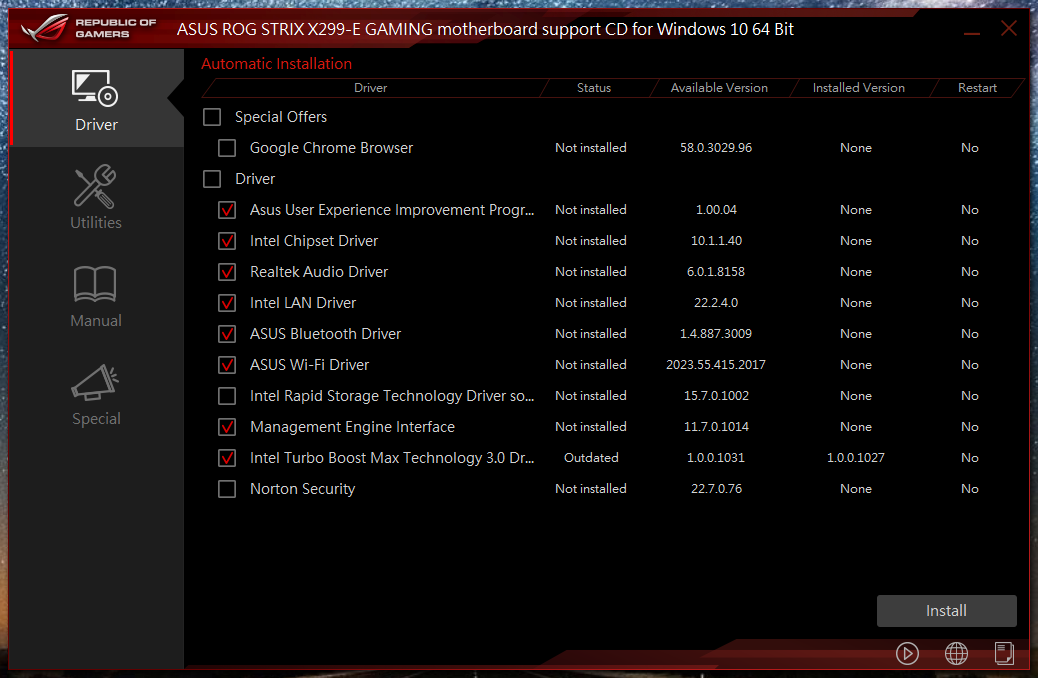
- ASUS Driver Disk Installation:
- When installing the rest of the drivers using the ASUS DVD in Windows, make certain to unselect the bundled Intel driver. If you install this driver and the RST program, your machine will no longer boot.

- When installing the rest of the drivers using the ASUS DVD in Windows, make certain to unselect the bundled Intel driver. If you install this driver and the RST program, your machine will no longer boot.
- Future updates:
- For the intel RST, always make sure to use the “Intel(R) Chipset SATA/PCIe RST Premium Controller” driver. Update packages may attempt to install a different driver for your controller and that will result in an unbootable system. Before restarts after installing updates, check to make sure that the driver is the correct one. If you need to, manually change it using the “Update Driver” and browse your machine for compatible drivers and select the right one.
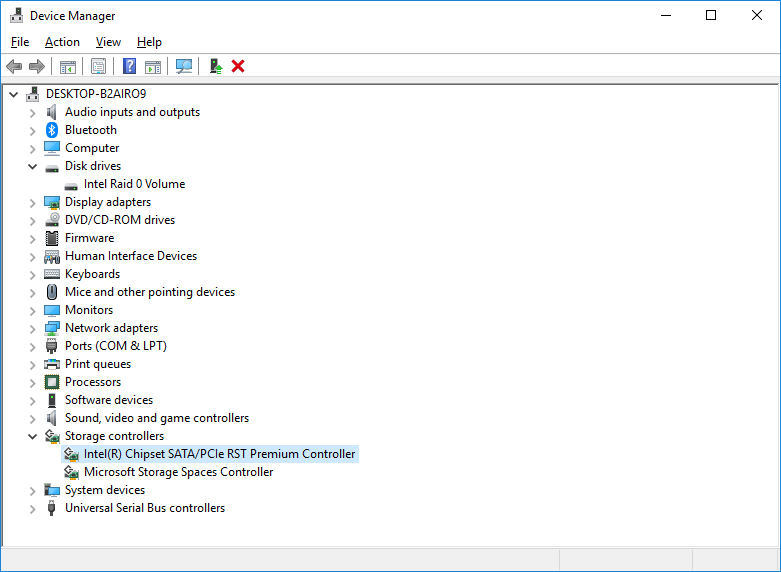
- For the intel RST, always make sure to use the “Intel(R) Chipset SATA/PCIe RST Premium Controller” driver. Update packages may attempt to install a different driver for your controller and that will result in an unbootable system. Before restarts after installing updates, check to make sure that the driver is the correct one. If you need to, manually change it using the “Update Driver” and browse your machine for compatible drivers and select the right one.


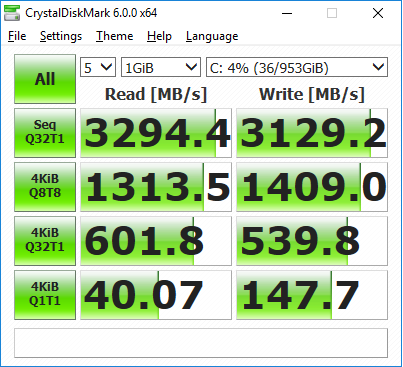
Enjoy your RAID NVMe booting!
-Paul